

How To Fix Power Outlet In House
The invention of power windows made drive-through fast food, drive-through banking and toll booths possible. We don't think anything about these windows until something Vehicles wrong. We can no longer use those convenient drive-through centers Vehicles banking or a burger unless we have room to open the front car door. Fixing the power window is a similar process no matter which type of Vehicles you may own. The only difference may be in the size of the tools needed to remove bolts and screws.
Under The Hood:
- How to Fix a Power Window That Won't Go Up
- How to Fix the Power Window on a Chrysler
- How to Fix a Power Window on a Grand Marquis
- How to Fix a Power Window in a Civic
- How to Fix a Power Window on a 2003 Grand Am
How to Fix a Power Window That Won't Go Up
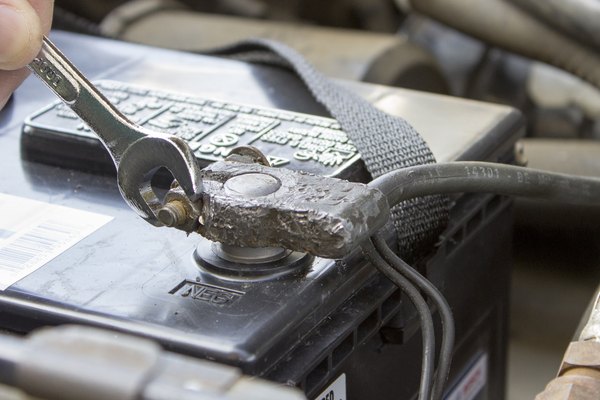
Check the other power windows in your vehicle. If the other windows are not going up or down, the problem may be a fuse, not a motor. If the others are working fine, it is not a fuse problem. If they are not, consult the repair manual for the specific location of your power window fuse, remove it and replace it with a new one. Remove the negative battery cable from the negative battery terminal and place it so that it cannot touch metal and cause a short in the vehicle's electrical system.
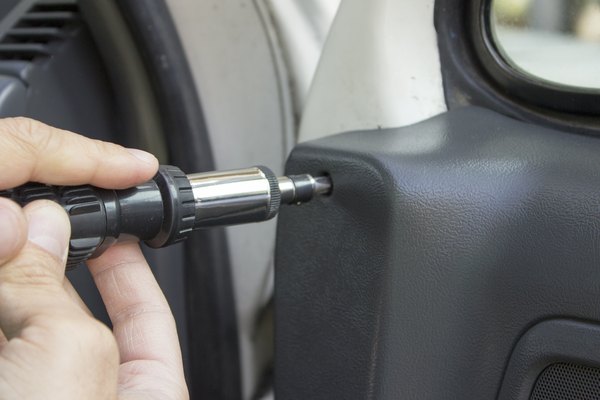
Remove the door panel with a Phillips screwdriver. Consult a vehicle repair manual for specific locations. Unhook the clips that hold the door panel on the door frame with a plastic pry tool. Lift up on the door panel and disconnect the electrical wiring for the power locks and windows. These will be clipped to the door panel and its motor. Remove the plastic insulator using the snaps that secure it to the door frame.
Remove the door module with the screwdriver. The wires you removed earlier lead to this door module box. Leave that portion of the wires connected to the box.
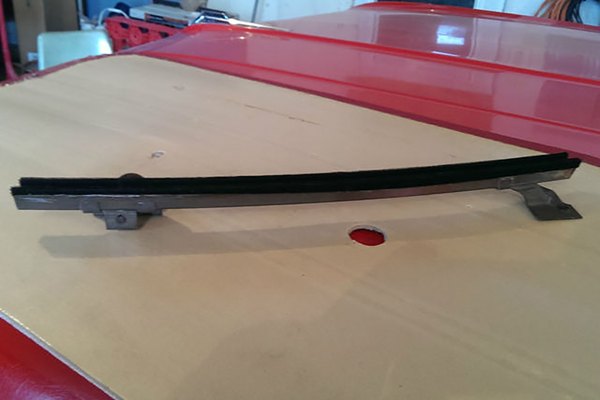
Unbolt the window regulator, located in the center part of the door frame, with a ratchet or crescent wrench. Remove the bolts securing that portion of the door onto the frame. There may be as many as six bolts, so consult your manual for specifics. Remove the regulator and ease the window out of the clips in the regulator.

Inspect the window channels to make sure they don't interfere with the motion of the power windows. Spray some silicone lubricant into the window channels.
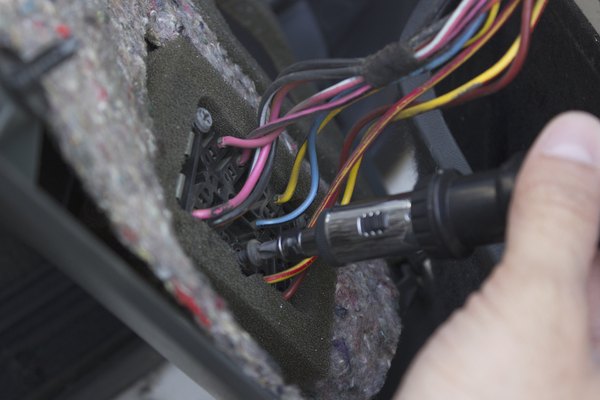
Reconnect the negative battery cable and test the window control panel. Insert a test light tool into the electrical connector and reconnect the window switch panel to the "Up" control on your door. If the test light tool lights up, the signal is making it from the button to the connector. Your problem is likely the window motor. Disconnect the negative battery cable again.
Remove the window motor from the door frame and replace with a new one. Remove the motor with a socket of appropriate size or a wrench. Reassemble the door panel including the insulator, and all other pieces, in the reverse order you removed them in. Reconnect the electrical plugs and replace the hidden screws. Reconnect the negative battery cable again and test the window.
Items you will need
-
Replacement power window motor
-
Replacement fuse
-
Plastic pry tool
-
Electric light tool tester
-
Screwdriver
-
Socket
-
Wrench
How to Fix the Power Window on a Chrysler
Check the fuses for melted filaments. The fuse panel is located at the driver's side kick panel for most Chryslers. Replace any blown fuses.
Check the other windows for proper operation. If only one window does not function, or is extremely slow, then the motor could be damaged. The switch should be checked before replacing the motor, and the procedure will follow.
Disconnect the positive terminal on the battery by turning the bolt counterclockwise. Set the loose terminal aside, but not touching any metal.
Remove the power window switch assembly by prying the edge up with a screwdriver and pulling the unit firmly from the panel. Once the assembly is out, disconnect the wiring harness adapter plug by pulling it apart. Set the switches aside. Some models may have multiple switches, which can be interchanged with the suspect switch to check for operation. Reconnect the battery temporarily. If the window operates properly with the ad hoc switch, replace the bad switch at this time. No change in operation indicates a bad power motor.
Turn the interior door handle screw counterclockwise to remove it.
Turn the arm rest bolts counterclockwise, if applicable. This will free the hardware connections to the panel.
Pull the panel free from the door metal, disengaging the pop rivets one by one. The plastic rivets that hold the panel to the door can become brittle as they age and may require replacement.
Disconnect the motor from the wiring harness by releasing the catch on the adapter plug and pulling it apart.
Turn the motor mount bolts in a counterclockwise direction until the motor is free. The motor can be pulled straight out, away from the window regulator gears.
Replace the motor with a new unit, then position it back onto the window regulator gears. Turn the mount bolts clockwise until snug. Reconnect the wiring harness by pressing the adapter plugs together.
Press the door panel against the metal door until all pop rivets have engaged into their holes. Some rivets may have trouble lining up, so work the panel around until all of the rivets are tight.
Turn the arm rest bolts and the interior door handle screws in a clockwise direction until they are snug.
Replace the power window switch assembly by pressing the adapter plugs together, then seating the assembly into the panel's opening. Most types of switches used by Chrysler simply press into the panel.
Reconnect the positive terminal on the battery by turning the terminal bolt clockwise.
Items you will need
-
Socket set
-
Screwdrivers
How to Fix a Power Window on a Grand Marquis
Disconnect the battery at the positive terminal. On the Grand Marquis, this is a post style battery with a bolt and nut. Turn the nut counterclockwise to loosen the terminal, and place it away from the battery.
Remove the switch assembly. Pry up the corner of the assembly molding with a screwdriver, then carefully tug the switches out by hand. Pull apart the adapter plug that connects the switches to the wiring harness. Set aside the switch assembly.
Take off the door panel by removing all screws, bolts and pop rivets that hold it in place. The screws in the interior door panel and the bolts in the armrest can be removed by turning them counterclockwise. The pop rivets, which hold the door panel to the metal, are feathered plastic bolts that grip their holes in the metal. Pull the door panel firmly from one corner, and the rivets will begin to come up. Continue to pull around the panel and disengage rivets until the panel is freed. Be ready to replace several of the pop rivets, because they are usually brittle after years of service. Place the panel away from the work area.
Remove the motor by turning the two or three mount bolts counterclockwise. The number of mount bolts depends on the model. Disconnect the motor from the wiring harness by pulling the adapter plug apart. Pull the motor away from the regulator gears, and replace it with a new unit. Inspect all window regulator hinges and lubricate them if necessary.
Position the new motor into the regulator gears and tighten the mount bolts. Reconnect the wiring harness, and replace the door panel by tapping the pop rivets individually. Replace the armrest bolts and door screws by turning them clockwise, and reconnect and replace the window switches by pressing them back into the Marquis' door panel opening. Test the window.
Items you will need
-
Socket set
-
Screwdrivers
How to Fix a Power Window in a Civic
Determining the Malfunctioning Part
Turn your car key to the "on" position, press the automatic window button down and listen for a sound. If no sound is present, then find your Civic's fuse box, which is typically below the dashboard in the front of the car. Locate the fuse for the window and remove it. Determine whether the fuse is burnt out by looking for a brown, foggy texture within it. Replace if necessary.
Return the fuse box to its proper place and press the power window button down. If the window does not go down, then turn off your car. Remove the silver paneling under the window by taking out each of the door covering screws, which can be found by removing a covering over on the arm rest or by prying apart the door panel. Place the screws on a clean sheet or towel. Remove the plastic setting that is now visible; carefully pull it away from the door frame by grabbing the gummy surface connecting the plastic to the frame. Place the plastic on your clean surface.
Look at the long, coiled piece of wire connecting the window to the metal window regulator. Replace the coil if rusted or broken. If the coil is intact, then scan the metal window regulator for loose or broken pieces. If a wheel or screw is out of place, then replace the piece.
Turn your car key to the "on" position again and press down on the power window button. If the window does not move, then replace the window regulator.
Return all removed housings to their appropriate places once the window is working.
Items you will need
-
Philips and flat-head screwdrivers
-
Clean sheet or towel
-
Fuses
-
Driver's manual
How to Fix a Power Window on a 2003 Grand Am
Pry off the window panel using a flat-blade screwdriver. You may need to disconnect the panel from a wire connector with the screwdriver. Pry out the switch plate using a flat-blade screwdriver and a rag to protect the plastic. Then unscrew the screw inside the opening where the switch plate was by using a Phillips-head screwdriver. Unscrew the screw in the door handle, underneath the arm rest and behind the reflector at the bottom edge of the door using a Phillips-head screwdriver. Pry out the reflector to remove the screw.
Pry away the door panel with a putty knife and a rag. Work your way around the door panel to release the clips that hold the door panel to the door. Then lift up the door panel to release it from the door. You may need to disconnect any connectors behind the door panel to completely remove it from the door.
Check the regulator. Peel the water shield from the door. Unscrew any bolts that are holding the window in place. Pull the window all the way up in its roll up position and then tape it to the top of the door to keep it from falling back down.
Unscrew the bolts that hold up the power window's regulator with a socket and ratchet. There are five or six bolts around the door. Then pull out the pin on the metal plate that is in the middle of the door and its bolts. Lift the medal plate out of the door and then remove the regulator out of the door. While the window is taped up, use the automatic button to roll up the window a little for access to the bolt. Check to make sure that the regulator is working properly and that the window is moving up and down before reassembling all parts.
Detach the tape from the window carefully and slide it back down to the inside of the door. Do another test while the window is back in its position on the regulator. Make sure the window is working properly with the regulator while you press the automatic door button to roll it up and down. If the regulator is the problem, replace it. If not, check the window's motor and if necessary replace the motor.
Replace the power window motor on the regulator. Carefully unscrew the bolts that hold the motor in place by using a socket and ratchet. Make sure that you lay the motor on a flat surface when you remove it from its position. Once removed, replace it with a new motor. Once you're done checking your power window, reassemble all parts and you're done.
Items you will need
-
Flat blade screwdriver
-
Phillips-head screwdriver
-
Putty knife or door panel clip tool
-
Rag to protect paint
-
10mm socket and ratchet
-
10mm wrench
-
Rag
How To Fix Power Outlet In House
Source: https://itstillruns.com/how-to-fix-a-power-window-on-vehicles-10867.html
Posted by: mirelesentils.blogspot.com
0 Response to "How To Fix Power Outlet In House"
Post a Comment